Installation
Ingantt is multi-platform, so install the version that is right for your device.
- Web: Open the app
- Windows: Get it from Microsoft Store
- Android: Get it on Google Play
- macOS: Download on the Mac App Store
- iOS: Download on the App Store
Have feedback, questions or suggestions? Contact us for support!
Video
Watch the video showing all the steps of this guide.
Logging In (Optional)
Once installed, you can start working with Ingantt right away by creating, opening, and saving local files on your device. If you would like to have your files in the cloud, you can Sign in to Google. This allows you to save and open your schedules from your Google Drive storage.
When signing in, Ingantt requires permission only to edit the files it creates. No other files are read or written, and permission for them is not requested.
Creating a Basic Schedule
Let’s say you have a small home renovation project with two tasks, one following the other.
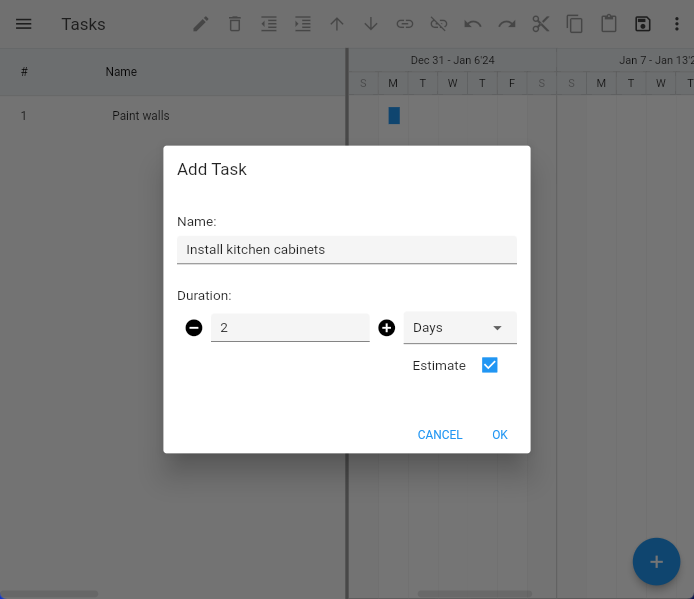
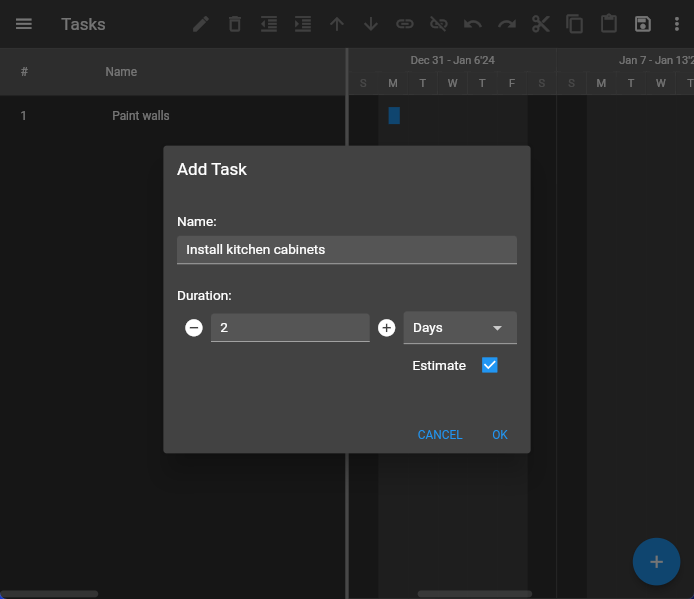
After clicking the Create new project button, you’re brought to a split screen with your future list of tasks on the left and your Gantt chart on the right. Add your tasks one after another by clicking the big + button in the bottom right and specifying the Name and predicted Duration of each task in the Add Task dialog.
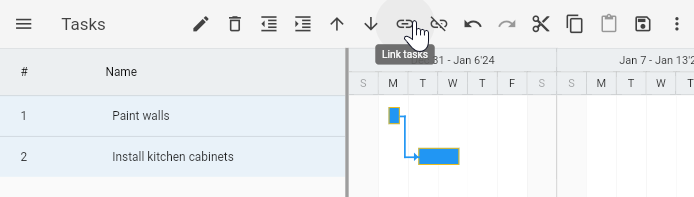
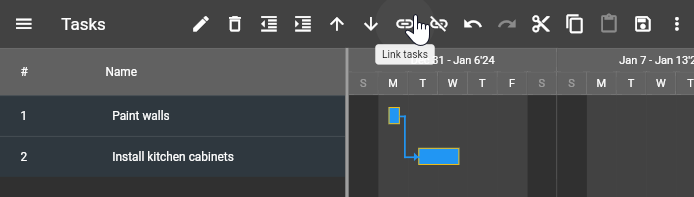
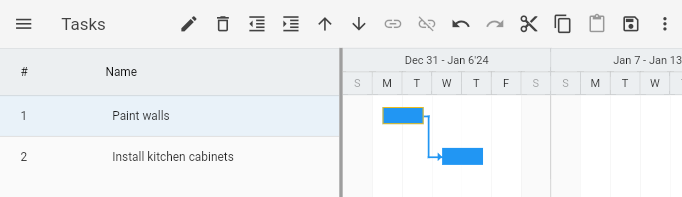
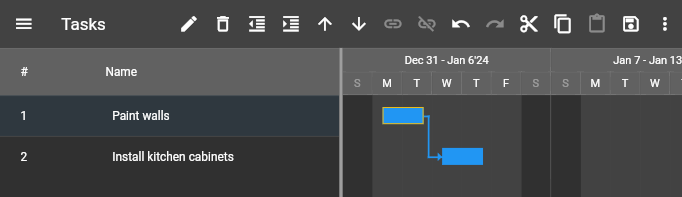
Select both tasks in the list on the left and then click the Link selected tasks toolbar button. This links the tasks and updates the Gantt chart.
- To select multiple tasks on Android and iOS, hold your finger a little longer while tapping each task in the list or the Gantt chart.
- On other platforms, click on tasks in the list or the Gantt chart while holding Ctrl or Shift.
Now that the tasks are linked, if you update the duration of the first task (by double-clicking it in the list or the Gantt chart and editing the Duration field in the Task Properties dialog), you will see how this change affects the schedule by shifting the second task.
Setting the Project’s Name and Start Date
Your project might start on a different day than the default used by Ingantt.
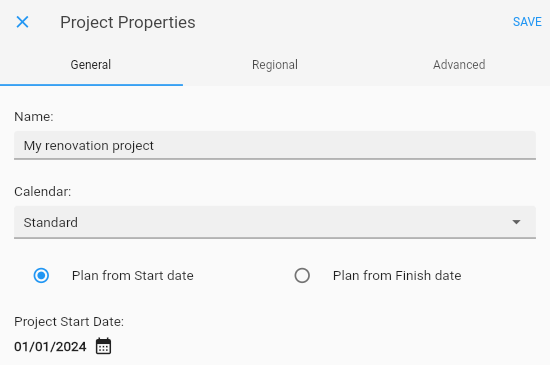
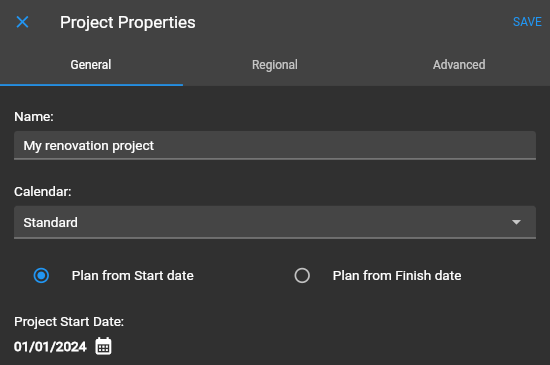
Click on the Show menu toolbar icon, then on Project Properties.
Set the new project start date in the Project Start Date field and change the Name of the project while you’re there.
With the simplicity of the basic schedule, you can already tell when the project is expected to end by looking at the Gantt chart.
Adding and Assigning Resources
Let’s say two different people will handle each of the tasks in your project.
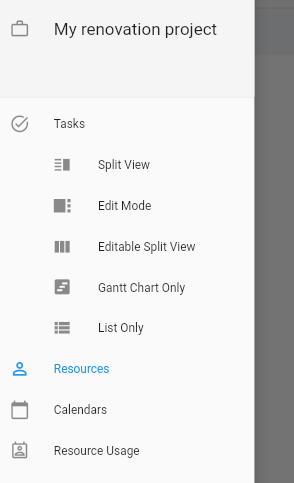
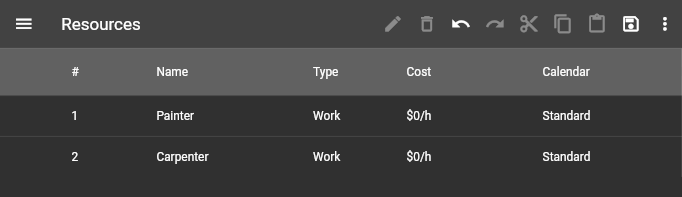
Click on the navigation menu button and switch to the Resources view.

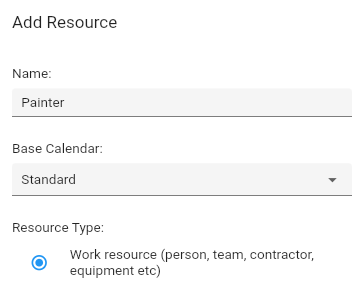
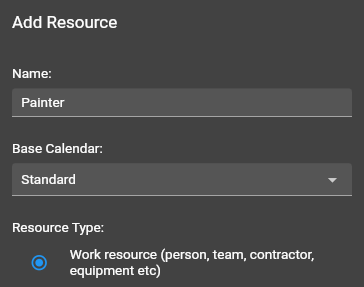
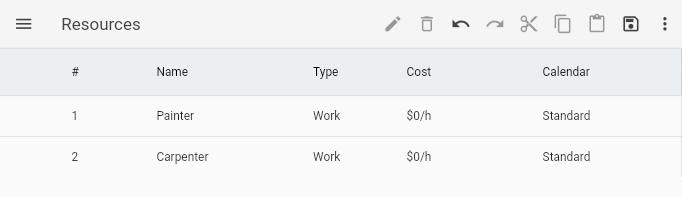
Click on the big + button and add a work resource to your project using the Add Resource dialog by giving the resource a Name. Repeat these steps to add another work resource.
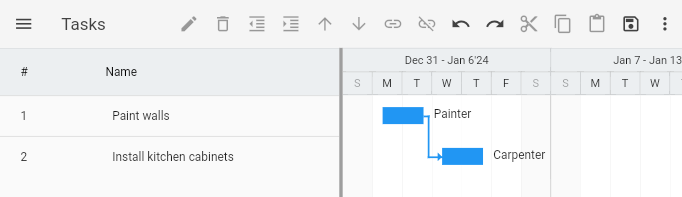
Using the navigation menu, switch back to the Tasks view. Double-click your first task in the list or the Gantt chart to open the Task Properties dialog.
Switch to the Resources tab, check your first resource to assign this person to the task, and save your changes.
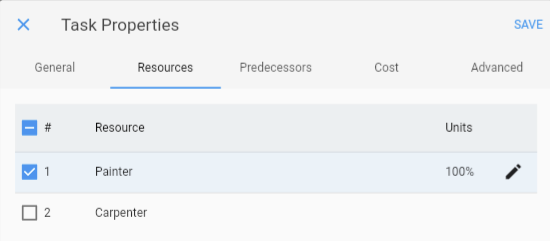

Repeat the same steps for your second task and the second resource.
Setting Vacations
People may have different events during the course of your project that affect its timeline.
Let’s say the resource doing the first task in your project needs a day off during it.
To configure this, use the navigation menu to go to the Resources view.
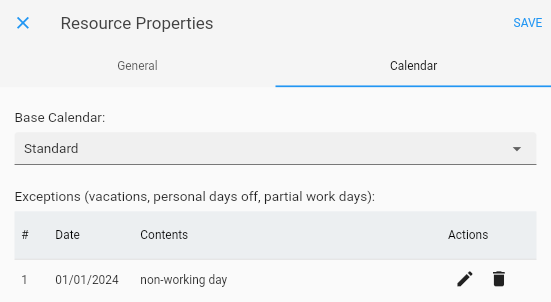
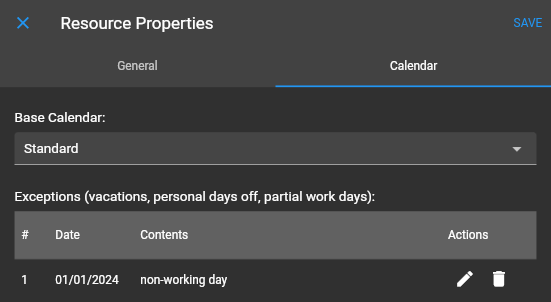
Double-click on the resource to see Resource Properties. Go to the Calendar tab and click the Add exception button. Choose one of the days during your project, leave the list of working times empty, and save.
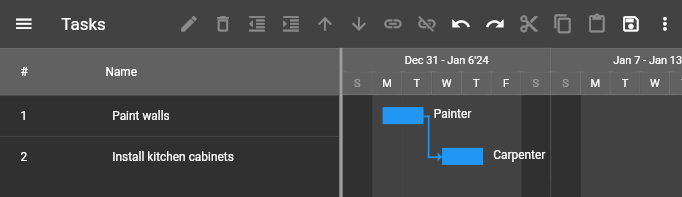
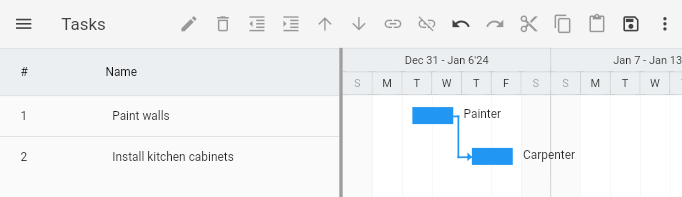
Using the navigation menu, go back to Tasks and see how your schedule has changed. The task following the resource’s task has shifted due to its dependency.
You can configure not only vacations but also other changes to a person’s schedule. For example, by adding working time to the Exception, you can specify that the resource works only during specific hours on that particular day.
Setting Holidays
Let’s say there’s a holiday during your project, a day when no work is done.
While vacations are configured through each resource’s calendar, days affecting everyone are configured in the project’s calendar. The default project’s calendar is called Standard and already indicates that no work is done on weekends.
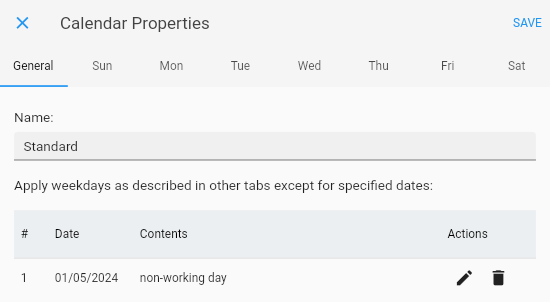
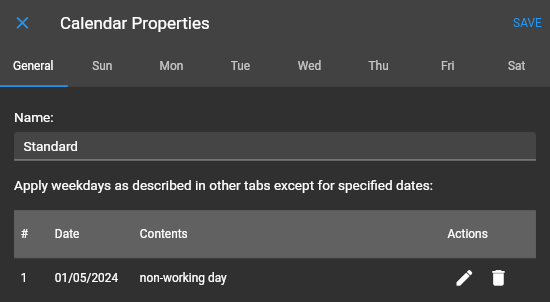
To configure holidays, use the navigation menu to go to the Calendars view. Double-click on Standard to see Calendar Properties. Click the Add exception button. Choose one of the days during your project, leave the list of working times empty, and save.
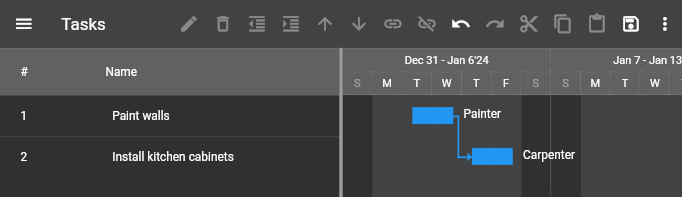
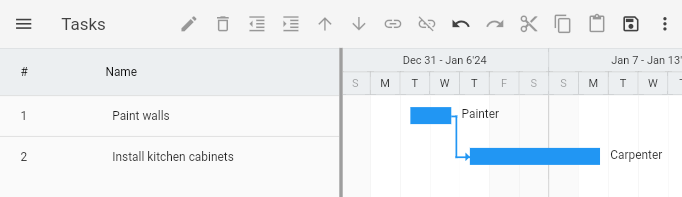
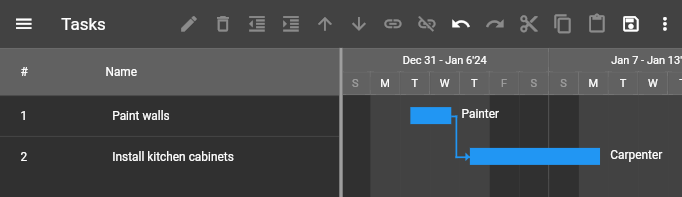
Using the navigation menu, go back to the Tasks view and see how your project has changed. The tasks are shifted, and the holiday is shown similarly to weekends in the Gantt chart.
Using the same approach, you can configure not only holidays but also other changes to everyone’s schedule. For example, by adding working time to the Exception, you can specify that everyone works only during specific hours on that particular day. You can also check the tabs representing each weekday in Calendar Properties. If your whole team, for example, leaves earlier on Fridays or works on Saturdays, you can configure this on the corresponding tabs.
Saving Your Schedule
You can save your schedule at any time by clicking the Save button in the main toolbar.
Depending on your choice, your schedule can either be saved as a local file on your device or in Google Drive.
If your project is saved at least once and Enable autosave is checked in the Options dialog, Ingantt saves every change you make to the file automatically to the destination of your initial choice: local or Google Drive.
The web version does not autosave to local files due to platform specifics.
Your project is always saved in a format that is fully compatible with Microsoft Project.